Merry and Bright layout by Grace

Friday, August 15, 2014

I know that we are in the middle of summer but I can’t help but get into the Christmas spirit when I saw these photos of my Holiday decorations. Today I’d like to share with you how I created this layout along with a fun way to add ribbons to your project….

Instructions:

 1. I 
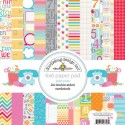
first pulled out papers and products that matched my photos.

2. I loved the circle die cut accent that came with this collection and used it as my journaling frame. I cut out a circle from a beige pattern paper and then adhered it on the back of the circle frame.

 3. I also added some stickers onto the journaling block before hand writing my thoughts.
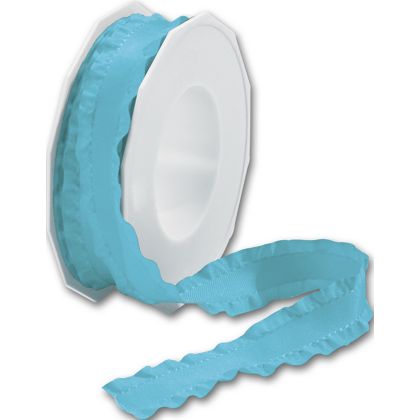
 4. I adhered all of my elements on the page and then added a ruffle red ribbon over the photos and scallop border for some added dimension.

5. Next I worked on adding some bubble stickers to my page. I used my ribbons with these plain bubble stickers for an easy way to add festive touches to the page. 


 6. For the smaller bubble stickers, I added them to some plastic scallop accents and brad makers.

7. Then I added them on three different positions in the layout to create a visual triangle.

Here’s the layout again with some close up details…


Thank you for joining me today and I hope this inspired you to create your very own holiday project, even if it’s in the middle of summer.

Happy Creating,
Grace
Supplies Used:
Doubleruffle red, 3/8”, Ribbons Unlimited Inc.
Dazzle, red, 7/8”, Ribbons Unlimited Inc.
Grosgrain,Stripes, 5/8”, Ribbons Unlimited Inc.
Countrycheck, Red, 1”, Ribbons Unlimited Inc.
Cardstock- Worldwin Papers
Pattern papers, stickers, die cut frame- Heidi Swapp
Epoxy stickers, brad maker and white embellishments- Epiphany Crafts
Pen- Millenium, Zig

Circle cutter- Creative Memories


Passion Fruit Ombre Card by Pinky First August Post

Wednesday, August 13, 2014

Hey there friends, 
it's Pinky again with my favorite OMBRE ribbon from Ribbons Unlimited-
 Summer is all about colors and sunsets and this Passion Fruit ribbon
reminds me of a slow sunset on the beach, perfect for this summer
themed acrylic card using Simple Stories. 
 There are so many colors to choose from.
Check them all out here!
Amazing colors and perfect style for all projects!


Tic Toc Cheer Bow Tutorial

Friday, August 8, 2014

Good morning!  Jamie back with you today to share a fun and easy way to create a 
Tic Toc Cheer Bow without having to use heat bond!  


Here's what you'll need:
Two 14" different colors of coordinating cuts of 1-1/2" ribbon
One 2" cut of 3/8", 1/2", or 5/8" coordinating ribbon
Zip tie
Hot glue gun/hot glue
Scissors
1/2" double sided tape

I am using the Lime/White Polka Dot Wired Ribbon and the Lime Princess Glitter Ribbon for my 1-1/2" cuts and 5/8" of the Apple Green/Lime Satin Ribbon for my center.

Here's the tutorial:
 1.  Cut 14" of each of your 1-1/2" ribbons.
 2.  Add 1/2" double sided tape to one end of your bows.
 3.  Join the two bows together.
 4.  Once your ribbons are together, form a loop with one side of the ribbon.
 5.  Form another loop with the other ribbon side.
 6.  Join the zip tie lightly around the center between the loops.
 7.  Play with your ribbon until you have the loops equal and the ends where you want them. Pull the zip tie tight and clip the end off.
 8.  Fold the glitter ribbon tail in half and cut the ribbon at an angle.  Place double sided adhesive on the other ribbon end where you would cut a matching angle.
 9.  Adhere the glitter cut to the ribbon tail, with the straight edge closet to the bow.
10. Your ribbon should look like this now.
11. Fold the ribbon tail in half and cut your angle in.
12. Your ribbon will look similar to this now.
13. Grab your coordinating center piece.
14. Place hot glue on the back and adhere you center ribbon on.  Wrap your center ribbon twice tightly around the center.  Cut your ribbon to fit on the back again and hot glue in place.
15. Add your bow hardware and you are ready to use!


Thanks so much for stopping by today!
Jamie


Party Girl by Crystal

Wednesday, August 6, 2014

Hello Ribbons Unlimited Inc. fans!
It's Crystal here with a Birthday card I made for my granddaughter. Today I am using ribbon from Ribbons Unlimited Inc. and a Julie Nutting Prima stamp set called "Party Girl".  I totally love the big 7" doll stamps but theses smaller ones are perfect for cards.

For this card I am using  Lime Organdy 5/8" delight ribbon 

Ribbons Unlimited bday card 001
I stamped and colored a second balloon and popped it up and added glossy accents over it
Ribbons Unlimited bday card 002

Ribbons Unlimited bday card 003

Ribbons Unlimited bday card 004

Ribbons Unlimited bday card 005

Ribbons Unlimited bday card 007
inside my card I used  Lime Organdy 5/8" delight ribbon
Ribbons Unlimited bday card 006
Here is a look at my matching envelope:
Ribbons Unlimited bday card 008

I hope this project was inspiring and it  gets you to create something special with ribbon from Ribbons Unlimited Inc.
Thanks so much for stopping by! Please leave me some feed back if you loved this project, I love hearing from my scrappy computer friends who love getting crafty : )
Crystal Lopez – Design Team member for Ribbons Unlimited
crystal_lopez_bio_pic


Come Shop With Us!

Friday, August 1, 2014

Ribbons Unlimited Inc. has been providing high quality decorative ribbon at wholesale prices to our customers for more than 20 years. From the largest corporations to the smallest home based businesses, we have the knowledge and background to serve the most demanding ribbon needs. You will find our customers in many sectors including crafts, gifts, packaging, clothing, bridal, stationers and many more!

We pride ourselves on customer service and make ourselves available via phone or email to discuss your next project. We really enjoy talking about colors and design with our customers and will gladly offer our opinion (only if asked) on all of the ribbon options available to you.

If you are an existing customer, we thank you for your loyalty and we appreciate your business. If you are new to Ribbons Unlimited, we wish you a heartfelt welcome and we look forward to working with you.

All of our prices are wholesale and with a $25.00 minimum order!
So what are you waiting for?  Come shop with us!


Shop some of our best selling categories by simply clicking on the images below!


After you shop, be sure to connect with us!


Related Posts Plugin for WordPress, Blogger...