Candy Grams by Crystal

Friday, May 30, 2014

Hello Ribbons Unlimited Inc. fans!
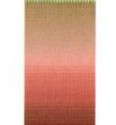
It's Crystal here with my Candy Grams. My daughter had her dance recital and I made these for the girls for all their hard work.  They did a wonderful job and candy and flowers are just what a girl needs, so I made these to give them after the show was over. They totally rocked it and I was so very proud of my daughter and her friends! I love the quality, shimmer and the expensive feel to the Ombre Pumpkin 1 1/2" wide ribbon from Ribbons Unlimited Inc. and it was the perfect choice for my Candy Grams .

Dance treats 004
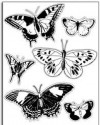
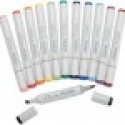
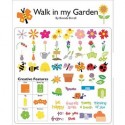
The first dance was a ballet and the girls were dressed as butterflies in green and orange so I copic colored them to match the girls outfits and glittered them up...
Dance treats 001
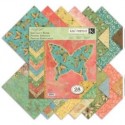
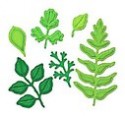
The Ombre pumpkin ribbon matched perfectly. I made a paper cone with a 10 x 10 sheet of double sided paper that I added a double stick tape that is very strong , inside is a cone shaped bag filled with Crunch n Much and i used a small rubber bang to seal it shut , the paper flower was cut on my Cricut and sized into 3 different sizes to layer it up , I added leaves and cording , the flowers have diamond stickles to add some bling .In my opinion the double sided paper was the best choice for this project , its thick and has color at all angles .
Dance treats 002

Dance treats 003

Dance treats 005

Dance treats 006

Dance treats 007

Dance treats 008

my daughter in her ballet outfit

Thanks for stopping by and until next time scrap of some fun and share it with others  ,
give them something to make them smile : )
8upscrapin_Logo
crystal_lopez_bio_pic


Thank You Envelope

Wednesday, May 28, 2014


Good morning!  Jamie with you today sharing a quick and easy Thank You Envelope which is perfect for gifting smaller gifts or even placing a card within!  

 
Other Supplies:

Here's the tutorial:
 1.  Cut out all the pieces for the Thank You Flower Sentiment.
 2.  Use your skewer or pencil to curl the petals.  Adhere the two center pieces together and push the points up.
 3.  Adhere the center into the middle of the smallest flower.
 4-7. Push the petals up toward the center then adhere the flower into the next sized flower form staggering the petals slightly.  Continue adding flowers and pushing the petals up toward the center until they are all in place.
 8.  Place a foam adhesive in the center of the sentiment.
 9.  Adhere the flower.
10. Size your envelope to fit your 12x12 mat and assemble.  Tie the Pink/White dotted ribbon in a knot around the center of the bag. Place the Kiwi Velvet Ribbon around the bag above the dotted ribbon and tie with twine.
11.  Tie the metal grey double faced satin ribbon around the dotted ribbon.  Tie off in a bow to the side. 
12.  Adhere the flower sentiment in the center of the ribbons with foam adhesives.


Thanks so much for stopping by today!


Ribbon weaved background by Grace Tolman

Friday, May 23, 2014


Hello Ribbons Unlimited Inc. friends. Recently I went to Ikea for some window shopping and also to gather some inspirations. Don’t you just love that place? Anyways I couldn’t resist grabbing a couple of the Tolsby frames. I have seen a few ideas on altering them on Pinterest and I thought I’d give it a go myself.  So with the help of the Apple chevron grosgrain ribbon and a fantastic. Dr. Seuss quote, I was able to create a frame fit for my bookshelf. 


 Instructions:
1. First off cut your cardstock to the size of the frame insert. Mine was 4x6. I then added some thin strips of adhesive on the top and bottom portion of the paper and adhered the ends of my ribbon.

 2. Then I added some more ribbon, horizontally, in a weaving fashion to create my background. I moved the ribbons a few times to make sure that they are even all around. After trimming the excess, I adhered the quote on the center and slipped the paper into the frame.
 3. To add some “dimension”, I adhered some homemade epoxy dots on the four corners of the quote on the OUTSIDE of the frame. This allowed me to add some dimension without adding bulk to the inside of the frame.
 4. Then I tied some satin ribbon into a bow, trimmed the edges and adhered it to the top of the frame. I adhered the ends of the ribbon to the sides so it didn’t block the quote from view. I also layered some flowers and added another epoxy dot in the center for a more finished look.

And here’s some close ups of the finished frame….

Creating a ribbon background to any project creates some unique interest and texture. I hope you’ll give it a go soon.

Happy Creating,
Grace
Supplies Used:
Applegreen/blue chevron 7/8”, Ribbons Unlimited Inc.
#088 DFSatin Ribbon, Pastel Green, 5/8”, Ribbons Unlimited Inc.
Frame- Ikea
Cardstock- The Paper Company
Flowers- Prima
Quote- Kaiser Craft


Mini Tree Album by Pinky

Wednesday, May 21, 2014

Hey there Ribbons Unlimited friends, 
Pinky here today with a second Ombre Ribbon project for this month!
 How much flair does this Sky Blue Ombre Ribbon add to this mini album?
 I simply took this keychain album, I punched out 2" circles for the
photo mattes, then I added the sticker embellishments. 
 After I pieced it altogether I added the Sky Blue Ombre Ribbon
to make it all more cohesive!
 It really does make it POP!

Products Used: 1 1/2" Sky Blue Ombre Ribbon, Clear Scraps Tree mini album, Pink Paislee papers. 


Beach House Decor by Pinky Hobbs

Friday, May 16, 2014

Hey there RU friends, 
It's Pinky today with a home decor piece you can make yourself 
using some chipboard wings and the amazing Sky Blue Ombre ribbon
which reminds me of the ocean for sure. 
 I covered the wings in patterned papers, then adhered them together.
I created a bow using the Ombre Ribbon to cover the spot I hooked them together. 
 I covered the entire thing in little stones and beach themed quotes.
Then to hang it I used the Ombre ribbon again. 
Easy and beautiful!

Products Used: 1 1/2" Sky Blue Ombre Ribbon, Clear Scraps Chipboard Wings, Quick Quotes papers. 


Wonderland Layout by Grace Tolman

Wednesday, May 14, 2014

Hello Ribbons Unlimited friends. I’m here to share with you a layout I created combining some grosgrain ribbon with washi tape. We all know that there are one hundred ways to use washi tape on its own but I noticed is that if you want it have a little more ‘body’ in your project, it needs to be adhered to a stronger foundation. Hence a plain grosgrain ribbon to the rescue. You not only add some flair to an otherwise plain ribbon but you also add great designs that washi tapes are so popular for.

 1. For this page, I started with a mint green cardstock and then cut up white cardstock that measured 11” x 11 ½” and adhered that to my double page spread foundation.  I then cut out a circle from orange pattern paper (I chose that color to resemble the sun) *If you don’t have a circle cutter, a plate would work just fine.

 2. I then assembled my page with the papers and pictures. Glue the elements to the page. With the orange circle shape, only adhere the center of the paper to the layout. This enables us to slip in the “sunburst” later on without having to worry about adhesive.

 3.  Adhere the washi tape over the grosgrain ribbon, centering it over the trim.

 4. Cut the ends into a notch.  Repeat till you have at least 4 small (about 2” long) strips of the ribbon/washi tape trim.

 5. Insert them under the circle paper. You can create a pattern (like I did) or make it random.

 6. When you’ve completed your sunburst pattern, adhere part of the trim underneath the paper with glue dots.

 7. Secure the trims around your paper by adding machine stitching to the inside edge of the circle paper.

8. Add some embellished canvas tags by adding some ribbon to the top.

9. Add a chevron design on the tags with a stencil and some mist. Add more embellishments to create a finished look. Hand write your journaling. 

Here are some more close up pictures of the layout…


I love how the yellow grosgrain ribbon added cohesiveness to the sunburst even though there are multiple patterns and colors.

I hope my project inspired you to combine your ribbons and washi tape together.

Happy Creating,
Grace

Supplies Used:
Grosgrainribbon, Pistachio, 5/8”, Ribbons Unlimited Inc.
Cardstock- WorldWin Papers
Papers- (white) DCWV; (others) SEI
Polaroid frame- Elle Studio
Washi Tapes- Doodlebug Design Inc.
Letter stickers- (white) Creative Memories; (brown) Doodlebug Design Inc.
Brads- My Mind’s Eye
Die cuts- (fresh and fun) Imaginesce; (border) GCD Studios
Canvas tags0 Maya Road
Chipboard accents- (stars) Pink Paislee; (others) Basic Grey
Word stickers- October Afternoon
Pen- (black) Millenium, Zig; (turquoise) Faber Castell
Circle cutter- Creative Memories
Border punch- Fiskars
Mist- Mustard, Heidi Swapp
Threat- Coats and Clark

Sewing Machine- Kenmore


Related Posts Plugin for WordPress, Blogger...