Painted Pumpkin with Crystal!

Friday, October 31, 2014

Hello Ribbons Unlimited fans !!

It's Crystal here and today I want to share a fun project using 
Ribbons Unlimited Organdy Ribbon!
I made ta cute pumpkin to put outside my front door to greet my guests .
I painted a pumpkin and added Ribbon and raffia to the top to create
a whimsical pumpkin that you could keep by the door thru Thanksgiving .

IMG_3345

IMG_3346

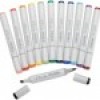
To make my pumpkin I used acrylic craft paint and free hand painted the face and leaves onto my pumpkin, no special prep other than wipe the surface clean , you can spray with clear spray paint when you are done but it is not needed (if you are going to paint and sell them spray a clear coat).

IMG_3333

IMG_3334

IMG_3335

IMG_3336

IMG_3337

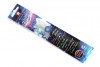
After I have her painted up aI added my raffia bow and the made a huge 9 loop bow to the stem, I used 2 3/4" Organdy Ribbon in Blue Mist for her, it added the sparkle I wanted.

IMG_3339

IMG_3340

IMG_3341

IMG_3342

IMG_3343

IMG_3344

IMG_3345

IMG_3346

Thanks so much for stopping by , leave me some feed back if you loved this project ,
I love hearing from my scrappy computer friends who love getting crafty : )
Crystal Lopez – Design Team member for Ribbons Unlimited

crystal_lopez_bio_pic


Finger Treat Boxes with Jamie!

Friday, October 24, 2014

Good Morning!  Jamie with you and today I am sharing Halloween Finger Boxes!  I am absolutely in love with these.  You can put all sorts of goodies in these boxes; handmade munchies, school supplies, crayons, or party treats!  

I am using the Emerald Grosgrain Swiss Dot Ribbon in 7/8" to embellish my boxes with! 


You can find the box tutorial HERE
Here is a quick tutorial for assembling the box details:
1.  Cut out the box and finger pieces.  Fold the box on the score lines and then place adhesive on the side tab and the bottom flap.  Adhere the box sides together and then adhere the bottom flap to the box side.
2.  Adhere the finger details on the finger mat piece as shown.   Place a strip of adhesive on one side of the box.
3.  Adhere the finger on the box, lining up the bottom and centering.
4.  Ink around the edges with a coordinating ink color.
5.  Slightly bend the finger nails.  Continue the steps for the other four boxes.


I love the pop of color the Emerald Grosgrain Swiss Dot Ribbon in 7/8" 
adds to the Skeleton Fingers!


You can find the boxes here:


Today Minibook by Grace

Friday, October 17, 2014


Hello there friends. Today I’m sharing a mini book project that I created using some 4x6 pocket scrapbook papers. Pocket pages and scrapbook supplies are a rage right now. While I don’t do project life, I still like to get the products cause they’re so cool. Recently, I got a pack of 4x6 papers designed for pocket scrapbooking. I used it as a base for my mini album. I then put it all together with a coil binding.  Because the papers were already cut into one size, I was able to put this book together in record time.


To spruce up the front of the book, I tied some colorful ribbons from Ribbons Unlimited Inc.


Here are a few pictures of the inside pages of the book…


I hope this inspired you to use those pocket scrapbooking products in your next mini album project.

Happy Creating,
Grace
Supplies Used:
#995 Grosgrain stripes, Yellow, 3/8”, Ribbons Unlimited Inc.
Grosgrain, Stripes, 5/8”, Ribbons Unlimited Inc.
Country check, Red, 1”, Ribbons Unlimited Inc.
Lilac Leopard Grosgrain 5/8”, Ribbons Unlimited Inc.
Giraffe 7/8”, Ribbons Unlimited Inc.
Edinburgh, Dress Stewart, 1”, Ribbon’s Unlimited Inc.
Papers and border stickers- Ruby Rock It
Letter stickers- My Little Shoebox
Cardstock- WorldWin Cardstock
Bind it tool- Bind it all, Zutter
Pen- Millennium, Zig

Enamel dots- homemade


Holiday Gift Giving Ahead! Pinky

Wednesday, October 15, 2014

It's getting to be that time of year again- time for making those
holiday gifts and preparing for November and December. 

Why not create a beautify handmade recipe book for that loved one
who adores your cooking or wants to save their own recipes!
For this Recipe Album I used a Clear Acrylic album 
then instead of tying it together I used a giant paper clip that I attached
a beautiful silky ribbon bow from Ribbons Unlimited. 
The paper clip is perfect for adding more pages too. 
I really just wanted it to POP and it does!

Everything about this is handmade and will be treasured. 
I cannot wait to see the face of the recipient. 


Magazine Inspired Card by Grace

Friday, October 10, 2014


Hi there ribbon friends. I am a big magazine reader. I love grabbing information, recipes, ideas and of course inspiration from the pages of lifestyle magazines. While browsing through an issue of HGTV magazine, I was stopped in my tracks with the photo of a cool door. As I studied the door, I noticed that the diamond design can easily be replicated with ribbons. Read on to see how I incorporated the design onto a thank you card.


Instructions:

1. For my square card, I cut out a 4 ½” square piece of white paper. I added some dazzle ribbon strips diagonally onto the paper. 

2. Next, I cut the square into four smaller pieces. 

3. Then I turned each square till I got a design that I was happy with. 

4. Then I adhered the blocks onto the center of a 5” square card. I then added a tiny strip of dark purple cardstock, a tied ribbon from more dazzle ribbon and two die cut tabs where I handwrote my sentiment. 

Here’s the finished card…

I used very minimal decoration on this card so that the eye can focus on the cool design created by the ribbon. 
I hope this inspires you to use some ribbon to create some cool geometric shapes for your next paper crafting project.

Happy Creating,
Grace
Supplies Used:
Dazzle Dotribbon 3/8”, Ribbons Unlimited Inc.
Cardstock-Bazzill
Pen- Millennium, Zig
Die cut tabs- SEI
Enamel dot- Homemade


Not So Scary Hair Bow by Pinky

Wednesday, October 8, 2014

 Hey friends it's Pinky today with a "Not So Scary" Halloween hair bow. 

Have you seen all the incredible fall colors in Ribbons Unlimited??
They make amazing fall hair bows and so much more!
For this bow I used the French Wired Tangerine Ribbon in 1 1/2" and it was perfect
to shape into the bow I wanted to create. 
 I created a simple bow then placed it on some black tulle.
After that I took an acrylic owl and glittered the back in coordinating
glitter and sealed it using glossy accents. 
Leaving the top side acrylic for a shine. 
I adhered the owl to the bow then added a hair tie. 
I also sealed the ends using fire. 
It's perfect for that not so scary fall look every little girl loves!

Check out all the amazing colors on Ribbons Unlimited.


Spider Bow with Jamie

Friday, October 3, 2014

 Good Morning Ribbons Unlimited, Inc. Fans!  Jamie back with you and today I am sharing a fun tutorial for creating a ribbon spider!  You can use these spiders for hair accessories, to decorate a vase, or even on gifts!  I placed my spider in the center of a bow on a hair tie so that we can use it on a vase and in our hair too!  

For my project I am using the following:

Here's the tutorial:
1.  Cut four 8" pieces and one 24" piece of the black satin ribbon.  
2.  Starting with the 24" piece, place a small piece of double-sided adhesive on one end of the ribbon.
3.  Adhere the ribbon to itself making about a 1-1/2" loop.
4.  Roll the ribbon around that loop then add another piece of double-sided adhesive to the end.
5.  Adhere the end in place.  Your loop should look similar to this now.
6.  Gather your four 8" strips together in one line.  Tie them around the loop.
7.  Pull the knot tight and pull the "legs" on each side out.
8.  Separate out the loop to form the body.
9.  Trim the "legs" at angles.  I did the front two in one direction and the back two in the other direction.
10. Next cut a 22" piece of the Princess Glitter Ribbon.  Get your hair tie and a zip tie for your bow if you are using it.
11.  Flip your bow over and place the hair tie on the back.  Feed the zip tie around and include the hair tie in and latch it together.  Fluff out your bow to have equal loops then pull the zip tie tight.
12.  Trim off the back of the zip tie.
13.  Flip your bow back over - it should look similar to this.  Fluff the bow as needed.
14.  Hot glue your spider in place in the center!


Thanks so much for stopping by today


Witchy Poo Card by Crystal

Wednesday, October 1, 2014

Hello Ribbons Unlimited Inc fans!
It's Crystal here and today I made a Halloween card using the Ombre Ribbon - Light Plum.  It adds the perfect pop to my card!  This ribbon comes in so many colors, you can find them and oh so many other shades and textures and sizes in the Ribbons Unlimited Inc. store. I am sure you will find something amazing for your next project.
witchie poo 008

witchie poo 005

witchie poo 009

witchie poo 010

witchie poo 011

witchie poo 004
I made my envelope to match , I call it  "Eye Candy for the Mail person"
witchie poo 001

witchie poo 007
inside my card
witchie poo 006
Thanks so much for stopping by , leave me some feed back if you loved this project , I love hearing from my scrappy computer friends who love getting crafty : )
Crystal Lopez – Design Team member for Ribbons Unlimited
crystal_lopez_bio_pic


Related Posts Plugin for WordPress, Blogger...