Showing posts with label Flower. Show all posts

Initial Door 'Wreath" by Nicole

Friday, September 4, 2015

Nicole on the blog today.  I've made quite a few door wreaths over the years.  Pretty much all were for a holiday or season and I actually don't have one that is for the everyday.  That is what I'm going to show you today is how I made my new "wreath" that is hanging on my front door.  I used French Wired Ribbon in Porcelain Blue as an accent and a hanger.


I started by making a template cut from card stock and used that to trace onto three pieces of chipboard.
I cut out three since the chipboard I had on hand wasn't very thick.  I then glued these three together to make the base nice and thick.  Now I gathered a few more supplies:  a dowel, book paper, and glue.

I started rolling the book paper on the dowel and gluing the edge.
Once glue has secured the edge, slide it off the dowel.  

Once you've made a good handful start laying them down and gluing to the chipboard.  

I worked in sections gluing down quite a few and then turning the chipboard over and cutting off the overhang with scissors.  

Here is the completed letter covered in rolled dictionary paper.

Next I started with a simple ribbon. 
 To get a full bow I cut another length of ribbon and slipped the length underneath this bow.  

Tie this in another bow the opposite direction of the bottom.  Clip the extra ribbon.  
I love using this ribbon technique when you I want something a little more full than just a simple bow. 
I finished with some card stock flowers that I attached using glue and foam adhesive.  


Here is another look at my finished initial hanging on my front door. 


Thanks for stopping by the blog today, Nicole


Flower SVG cut files by Jamie Cripps from digiplayground.com


Graduation Gift Set by Nicole

Friday, June 5, 2015

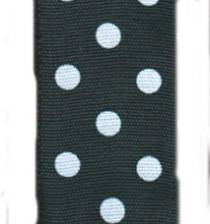
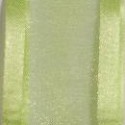
Graduation season is here.  Since I work with the youth at church I had a graduation to celebrate this year.  Our local high school colors are black & yellow with white accents.  I used Black/White Polka Dot wired ribbon, Sheer Organdy ribbon in Apple Green, and Dazzle Ribbon in Ivory to decorate this gift bag.  


I added the Black/white polka dot ribbon through the holes in the bag and secured it on the inside with Helmar Fabric Glue.  Side note:  Between the depth of the holes in the bag and the wire in the ribbon the handles stood up on there own.  I love the look and height it creates to the finished bag.  


The organdy ribbon I used to make leaves.  I brushed Helmar Stiffener & Draping Liquid to lengths of the ribbon with a foam brush.  Fully saturate the ribbon and let dry.  


After a couple of hours the glue dries and the ribbon becomes stiff and you can carefully peel away from the paper plate.  
The stiffener makes the ribbon stiff, but it also allows you to cut the ribbon and keeps it from fraying.  I used a pair of fabric scissors and cut the ribbon in to leaf shapes.  

I glued these to the bag handle.  

I then took a length of the glitter ribbon to make my flower.  I threaded it onto a piece of wire to form the base.  

I formed the wire into a circle and twisted the wire onto the base cutting off the excess.  

I took another length of the glitter ribbon and began gluing it around itself to form the center making sure to cover the wire and inside.     

My finished flower.

I glued this on top of the leaves. Once finished I decided to add some depth to my flower with a yellow marker making the insides of the flower a little darker.  


Here is a look at the finished gift bag and card I gave to the graduate.  She loved it!

Thanks for stopping by the blog today.  
Happy Crafting, Nicole

Products used in this post:

All digital svgs are from digiplayground.com


Thank You Envelope

Wednesday, May 28, 2014


Good morning!  Jamie with you today sharing a quick and easy Thank You Envelope which is perfect for gifting smaller gifts or even placing a card within!  

 
Other Supplies:

Here's the tutorial:
 1.  Cut out all the pieces for the Thank You Flower Sentiment.
 2.  Use your skewer or pencil to curl the petals.  Adhere the two center pieces together and push the points up.
 3.  Adhere the center into the middle of the smallest flower.
 4-7. Push the petals up toward the center then adhere the flower into the next sized flower form staggering the petals slightly.  Continue adding flowers and pushing the petals up toward the center until they are all in place.
 8.  Place a foam adhesive in the center of the sentiment.
 9.  Adhere the flower.
10. Size your envelope to fit your 12x12 mat and assemble.  Tie the Pink/White dotted ribbon in a knot around the center of the bag. Place the Kiwi Velvet Ribbon around the bag above the dotted ribbon and tie with twine.
11.  Tie the metal grey double faced satin ribbon around the dotted ribbon.  Tie off in a bow to the side. 
12.  Adhere the flower sentiment in the center of the ribbons with foam adhesives.


Thanks so much for stopping by today!


Organdy Ribbon Roses by Crystal

Wednesday, February 5, 2014

Hello Ribbons Unlimited Friends!!
It's Crystal here with a tutorial on how to make roses out of Organdy  2 3/4" size ribbon! Ribbons Unlimited Inc. has a ton of colors so I am sure you will find the right color for your project.  If you follow my blog any at all you know I love making flowers and I will make them from anything that will hold still..lol. Today I am making these roses for hair clips, but again use your imagination as these can be added to anything to doll up your projects.
organdy roses 034
Lets get started
Take your ribbon and fold back and forth until you have 8 layers square 2-3/4 
(this doesn't have to be exact)
organdy roses 001
Your ribbon should look like this now...
organdy roses 002
Find the center and make starter hole with a piercing tool:
organdy roses 003
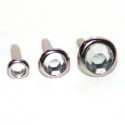
Then add a brad to center of the ribbons
organdy roses 004
Cut each layer apart so they are now single layers
organdy roses 005
Next make cuts from each corner to the center, do all four sides
organdy roses 008
Then twist the layers so they are all off-center and use your heat gun and carefully heat the ribbon and it will melt and curl (I use a heat gun and not lighter because the lighter will leave brown or black on light ribbon and with the heat gun you also have more control).  Do this until you have the desired look!
organdy roses 011
Your completed rose should look similar to this:
organdy roses 012
Here is the back side of the rose:
organdy roses 013
I also made a smaller one use half the width (folding it over) and only do 4 layers:
organdy roses 014
Cut in half and now you have 8 layers, add brad and make your cuts and heat
organdy roses 015
Here are my 3 flowers! 
Don't you just love how pretty these are? 
This Organdy ribbon has a beautiful shimmer to it...
organdy roses 018
To finish my flowers, I make loops for the leaves with the lime organdy delight 5/8" ribbon
organdy roses 019
organdy roses 022
Then I add felt circles to the back for a more finished look...
organdy roses 024
TIP ALERT: If you are making these for little baby's with fine hair add some of the No slip sheet  (found by the liners for the kitchen cabinets) to the inside of the clip now the flower will not slip on fine hair!
lipgloss tut 020
Now a look at my finished hair clips!
organdy roses 025

organdy roses 027

organdy roses 034
Thanks for stopping by the blog , I hope you learned something new to try with the amazing ribbon found at Ribbons Unlimited! Be sure to stop by the store and order some for those upcoming projects. 
Get scrappy and make something that makes you SMILE : )
8upscrapin_Logo


Related Posts Plugin for WordPress, Blogger...