Showing posts with label Frame. Show all posts

Holiday Frame Gift Project By Pinky

Wednesday, November 12, 2014

Have you checked out the selection of ribbons from RU lately?
Hi there, it's Pinky today with this holiday frame project.
Actually this is my favorite time of year to craft because I love the holiday
glitter and shine that happens!
For this project I used Gold Krylon paint, along with Clear Scraps Mascils, 
Tri-Fold Frame, and Flower Mixers. 
And some beautiful ribbon from Ribbons Unlimited along with some 
crystals, and card stock. 


I am happy with how it turned out and it's so much richer with Ribbons Unlimited ribbon. 
What gifts are you making this year??


Altered Frame by Crystal

Friday, February 28, 2014

Hello Ribbons Unlimited, Inc. Friends!
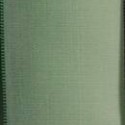
It's Crystal here and today we are going to vamp up a picture frame with ribbon from Ribbons Unlimited inc. and some handmade paper flowers. For this projects I used Ombre Wired - Grass green 1 1/2" ribbon.  This ribbon is so pretty and I love the dark to light ombre effect it has.  The ribbon adds so much interest and pop to your project!  
Let's get started ...
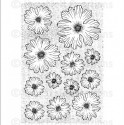
First I am making my paper flowers.  I stamp two pages of flowers , this stamp is set up as a background stamp  so this makes it easy!
(all products I used will be linked below at the bottom of this post)
Ribbons Unlimited  2-28-14 001 - Copy
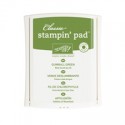
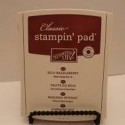
This is what it looks like stamped out.  I used pink cardstock and a rich razzleberry ink.
Ribbons Unlimited  2-28-14 002 - Copy
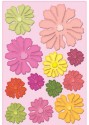
The die that cuts these out is set up the same as the stamp so its easy to line up and cut about a dozen different sized flowers at once! I cut two sheets worth of flowers to work with.
Ribbons Unlimited  2-28-14 003 - Copy
This is what it looks like when cut out...
Ribbons Unlimited  2-28-14 005 - Copy
Next I stack by flower size:
Ribbons Unlimited  2-28-14 006 - Copy
Then  I use a dabber and more razzelberry ink to
 ink the edges of the flowers and the centers...
Ribbons Unlimited  2-28-14 007
Next use a stylus and molding mat to shape the flowers.  Lay face down and rub every petal from the tip of petal and pull to center, this curls the petals.  Turn over face up and rub a circle in center this makes the flower take shape, then pinch each petal at the tips.
Ribbons Unlimited  2-28-14 010
Layer up the flowers!  
I make different sizes because no flowers all open the same or are the same size!
Ribbons Unlimited  2-28-14 012
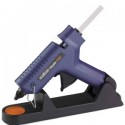
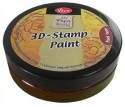
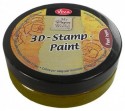
Next I use 3D paint in walnut on flowers and moss green on leaves.  I cut 8 and 7 inch strips of the ribbon and hot glue into a tailless bow shape:
Ribbons Unlimited  2-28-14 015
I then layout the flowers to see placement.   Once I determine that I have enough flowers for my 8"x10" frame, I cut a 24" piece of ribbon and start at corner and run down the bottom and up the side and twist and hot glue on the frame.  Next I angel the tails of the ribbon then hot glue on my leaves and bows and flowers.
Ribbons Unlimited  2-28-14 013
Here is the finished frame!  What do you think? 
The sweet model is my 8 yr old daughter Zoe's school picture
Ribbons Unlimited  2-28-14 016

Ribbons Unlimited  2-28-14 018

Ribbons Unlimited  2-28-14 019

Ribbons Unlimited  2-28-14 020
Look how pretty this ribbon is!  I am so going back to the Ribbons Unlimited Inc. store for more of this!  The Ombre Ribbon comes in several colors I am sure you can find just the right color for your projects.
Ribbons Unlimited  2-28-14 022
Thanks for stopping by!
 I hope this has inspired you to create something that makes you Smile : )
8upscrapin_Logocrystal_lopez_bio_pic


Framed Holiday Decor with Christine

Wednesday, December 4, 2013

Hi Ribbons Unlimited Fans!  Christine joining you again today! I'm so excited that it is the Christmas Season and today I have simple way to add some holiday decor to your home.

 One thing I like to do is switch out some of the pictures in my picture frames for a Christmas look.  I go very simple!  All you need is a vibrant piece of Christmas patterned paper.  This one comes from Doodlebug Design.  Then if you add ribbon you can make it look like the top of a present.

I added a real simple bow (that doesn't look simple.)  First of all the key to making this bow easy and with lots of dimension is to use wired ribbon (for this one I used the Luxor Wired Metallic Ribbon in red).  To make it simply cut 7 strips of equal sized ribbon.  Fold them in half and staple the ends together.   Then lay 6 out to look like the base of the bow.  Cover up the mess center with one more in the middle (use some good fabric glue and it sticks in nice and easy).  Then use your fingers to puff them up and make them pretty!  I also left the glass off the frame, so that my bow wouldn't get smashed back down!

Hope your holiday season has started off wonderfully!


Be sure to enter to win!
Simply click the photo and fill out the Rafflecopter 
to get your chance at $1,100 CASH!


Related Posts Plugin for WordPress, Blogger...
‚