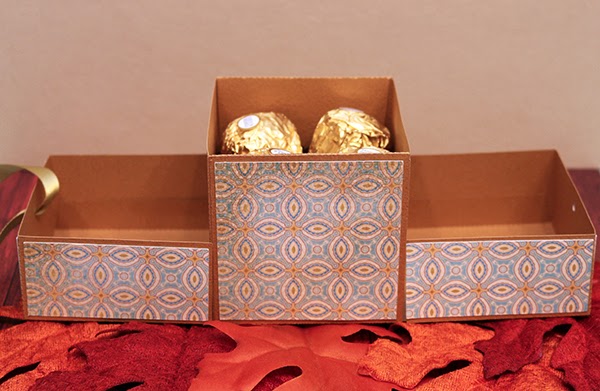
Good Morning! Jamie back with you today sharing a fun gift box embellished with one of my favorite ribbons, the Golden Olive Double-Faced Satin Ribbon! There are 196 colors available in widths up to 2-1/4" on the online store, and you can even special order widths up to 4"!
This box opens up on both ends to reveal a box inside,
which is perfect for stashing candies in!
Here is the tutorial:
1. Cut the boxes and mats then fold the boxes on the score lines.
2. With the smaller box, place adhesive on the four side tabs and adhere them to the box sides to form its shape. With the large box, place adhesive on the four tabs then adhere the long sides to them as shown.
3. Adhere the smaller box inside the center of the larger.
4. Place adhesive on the sides and the coordinating tabs then adhere those sides to the box and fold that tab over within the smaller box. Do this for both sides. This will hold the center box in place.
5. Adhere the mats in place and place your goodies in the box.
6. Once mats are in place, I punched a small hole in each side so that I could run my ribbon through.
7. I push the ribbon up through the holes and pull the ribbon tight as I close the box.
8. Cut out the Thank You sentiment and adhere to a tag. Note: I cut my Thank and You apart so that I could move them to fit my tag better. Tie a bow on the box and then tie the tag to the bow.


2 comments:
This is a really neat project. Do you happen to have dimensions for the box with score lines and cut lines for your tutorial? Or did you use a cut file?
Thanks!
bexcruger at gmail dot com
This is a cut file from Samantha Walker.
Post a Comment