Scrapbook Layout with Crystal

Friday, September 26, 2014

Hello Ribbons Unlimited Inc. fans !!
It's Crystal here and today I have made a scrapbook page layout and I used the oh so sheer  shimmery beautiful Organdy ribbon in Toffee 2 3/4" wide  from Ribbons Unlimited Inc. 's online store , I did something different for me today I took my layout outside in the sun to take my picture so you can really see the sheen this ribbon has , it will blow you away when you get it home and really see how beautiful it really it , pics sometimes do translate this but I tried my best for you to see it .


I started with black cardstock base and added a sheet of Heartfelt Creations  12 x 12 designer card stock and distressed the edges and tore some places and then ink the edges with Tim Holtz walnut stain ink , my picture I will add later is 4 *6 so I cut my black layer 4 1/4" * 6 1/4 " , my  purple flowers  ( two different shade of purple ) were cuts from the Silhouette store its called Silhouette Online Store 3D Chicago Peace Tea Rose  , I cut them ink the edges in a pearl and the spritz with water and mold them from the back side of the flower on a molding mat I used a 12 mm ball stylus to form them then I set aside and let them dry then after they are dry I layer them up with glue dots  ( I make my own , if you want to know how leave me a commit and I'll show on my Wed post )  , my white flowers are made with fringe scissors cut 1 " strips and fringe cut and roll up smash top down and you have a cool flower , my green leaves are a My Favorite Things die cut called large leafy flourish ,  the silver fern like leaves are from Spellbinders foliage set , I assemble all in place and then spritz with shimmer spray in a purple /blue I make myself  on the flowers and the page to add shimmer  splats. The bow is a four loop  and made with Organdy ribbon in Toffee 2 3/4" wide

ribbon layout 001 - Copy ribbon layout 002

ribbon layout 003

ribbon layout 004

ribbon layout 005
look at all the shimmer on this ribbon
ribbon layout 006
Thanks so much for stopping by , leave me some feed back if you loved this project , I love hearing from my scrappy computer friends who love getting crafty : )
Crystal Lopez – Design Team member for Ribbons Unlimited
crystal_lopez_bio_pic


Pop-Up Card with Jamie

Wednesday, September 24, 2014

Good Morning Ribbons Unlimited, Inc. Fans!  Jamie back with you and today I am sharing a pop-up card made elegant with Buttermilk Double-Faced Satin Ribbon!  This ribbon is so gorgeous and feels just as amazing as it looks!  

Here's the tutorial:

1.  Cut out all your pieces.  Bend the leaf pieces up from the mat as shown.
2.  Curl your flower petals with a skewer/pencil then layer the two flower pieces together staggering the petals and adhere the center to the flower, pulling the points up as shown.  
3.  Adhere the flowers to the mat with foam adhesive and tie a ribbon to embellish.
4.  Adhere the mat to the card base using foam adhesive, centering.

Thanks so much for stopping by today!
-Jamie


Altered Jewelry Organizer by Grace

Friday, September 19, 2014

Hello ribbon friends. One of the things on my “to make” list is a jewelry organizer. I’ve seen various kinds in Pinterest and decided to go with a frame one.  I found a frame that had a nice edge/frame to it at the thrift store and knew that it would be a perfect base for my project. With the help of some grosgrain ribbon fromRibbon’s Unlimited Inc., my project came together in a snap and with lots of personality. Read on to see how I created my frame.

Instructions:
1. First step was to paint the frame. At first I decided to hand paint it with a brush and acrylic paint. But because my frame has many intricate parts, it was hard to give it a good overall coverage. So I bought a small can of spray paint and then painted it brown instead of my original idea of apple green. 

 2. While the paint is drying, I worked on the center of the frame. I measured the inside part of the frame and cut a piece of cardboard to fit.

3. Then I found this chicken wire paper from my stash and adhered it to my cardboard backing. I trimmed off the excess using a craft knife.

 4. Then I laid my ribbon diagonally onto my board and started cutting them at an angle.

5. I repeated the same process with the ribbons going on the opposite direction and cut the trims to my desired length.  

6. Next I laid the ribbons, weaving them through each other to create the cross pattern and then hot glued the ends to the back of the cardboard. 

7. I then adhered the cardboard to the existing frame backing with some more hot glue and it was ready to be used. 

 Here’s some more close up of the project….


Thank you for joining me today and happy creating.
-Grace

Supplies Used:
#995Grosgrain stripes, Yellow, 3/8”, Ribbons Unlimited Inc.
Frame- Thrift store
Pattern paper- Hambly Screen Prints
Spray paint- Krylon
Others- Cardboard, Hot glue gun


Mason Jar Album with Wired Ribbon

Wednesday, September 17, 2014

Hey there friends, I have a new project to share today and it uses
it's the perfect addition to this Mason Jar Album. 
I love the jar design with the pop of light yellow. 
I used Krylon Satin Nickel paint and Pink paint to paint the album. 


On this page I hot glued a blow from the ribbon onto a flower and added crystals. 
Perfect way to end this album


Ribbon Accents for Layouts by Grace

Friday, September 12, 2014


Hello Ribbon friends. Today I’m sharing a layout I created recently with some ribbon accents from Ribbons Unlimited Inc. My favorite part of adding ribbon to my scrapbook pages is finding ways to layer and create dimension with them. With the different widths that Ribbons Unlimited Inc. offers, it was super easy to achieve my goals. Read on to see how I created this scrapbook page….


Instructions:
1. Gather your supplies


2. Trim the grey pattern paper to about 11 ½” square and adhere to the yellow cardstock, centering it. Adhere the pictures. 


3. Add the journaling block on the bottom of the layout, next to the photo. Cut the ends of three different ribbons into a notch and adhere them on the left side of the layout, layering them over each other a little bit. 


4. Add the title using two different sizes of letter stickers. 


5. Add the yellow grosgrain striped ribbon on the bottom of the layout, ruffling it a little bit and attaching it with some machine stitching.  


6. Add other embellishments, layering them over each other. Add some glitter glue to the centers of the butterflies and set aside to dry.

Here’s a few close ups of the scrapbook page…


I hope this inspired you to layer your trims and ribbons on your next scrapbook page.
-Grace


Supplies Used:
#995 Grosgrainstripes, Yellow, 3/8”, Ribbons Unlimited Inc.
Royal/white dots, Polka dot, 1 1/2", Ribbons Unlimited Inc. 
Grosgrain,Stripes, 5/8”, Ribbons Unlimited Inc.
Countrycheck, Red, 1”, Ribbons Unlimited Inc.
Cardstock- Worldwin Papers
Pattern papers- My girl, American Crafts
Butterfly chipboard- Studio Calico
Glitter glue- Turquoise, Stickles, Ranger Industries
Stickers- American Crafts, My Mind’s Eye
Circle punch- EK Success
Pen- Millenium, Zig


Bird Cage Album using Wired Ribbon

Wednesday, September 10, 2014

Hey friends, it's Pinky today with another fun Ribbons Unlimited project. 

I cannot imagine making any of my crafts without using Ribbons Unlimited Ribbon
including this bird cage mini album!
The Wired Ribbon in Mint Green is the perfect addition to set this album
in order. 
I used the 1" Wired Ribbon in Mint Green not only to close the album,
But also on the inside pages. 
It makes the perfect embellishment to any album or card for any paper crafter!
I even used it as leaves on the floral area. 
Wired Ribbon in Mint Green plus doilies equals the perfect gift for someone 
who wants to commemorate this memories or just remember you gave
them a special handmade gift!


Fall Ribbon Projects from Pinterest!

Friday, September 5, 2014

Good Morning!  Jamie with you here today and I thought it would be fun to share with you some of my most favorite Fall Ribbon projects that I have found on Pinterest!  You can get to the pins by clicking on the images!

Wreaths:
 

How gorgeous would this next one be with our Pumpkin Ombre Ribbon?


I just love these fun hair clip ideas from FunkyPolkaDotGiraffe!

She even has a witch on her blog:

...and I found this witch from My Baby Boutique too!
Totally cute!


Of course, I always love clever DIY projects like these:


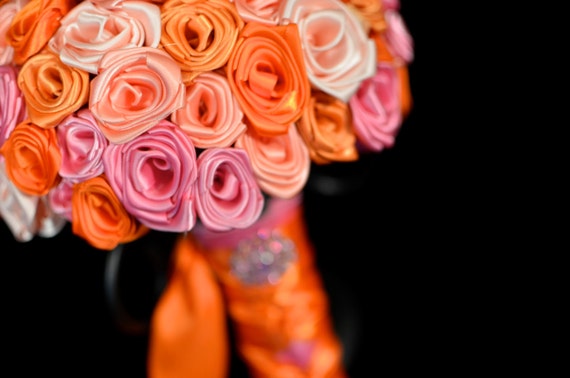
And we couldn't forget to share a gorgeous ribbon bouquet 
from our friends at Elegance On The Avenue
Simply Stunning!

I hope you enjoyed today's featured pins!

We would love to see some of your favorite ribbon projects that you have done or have found on Pinterest!  Be sure to link us up in the comments!


Related Posts Plugin for WordPress, Blogger...