Pin Cushions with Pinky!

Wednesday, February 19, 2014

Pillow Pin Cushion Tutorial by Pinky

Hey there RU friends, 
It's Pinky here today with a step by step tutorial on creating these
little Pillow Pin Cushions that are so handy to have around the house!
Even if you don't sew alot- it's nice to have safety pins or any pins handy. 
With the use of Ribbons Unlimited ribbon you can hang one anywhere!

Trim out 2 fabric pieces in 5"X5".
 Turn right sides in and stitch around edges- 
leaving a 2-3" hole to stuff on one corner.
 Flip Pillow Pin Cushion the right way.

 Stuff (I love to use old pillows for this!). 
 Place in the hole and stitch shut from the outside. 
Hand stitch bow created from
 Stitch a button in the middle to create pillow effect. 
 Now it's ready to hang or just stick your pins into!
I hope you enjoyed my mini sewing project today- 
Until next time- Keep on creating!

Products Used:
Samantha Walker Fabric, Blumenthal Lansing Button.


Every Heart Project Can Use RU!

Friday, February 14, 2014

Happy Valentine's Day friends!!

Pinky here today sharing 2 special "LOVE-ly" projects using Ribbons Unlimited
Ribbons. Of course RU is fantastic for any bow or hair ribbon, and also
sewing, but it also adds that perfect touch to all your paper crafting project as well!

For this first project I used the Double Ruffle Red 3/8" Ribbon to 
tie together this special "Be Mine" mini album. 
 This album wouldn't have near as much pop if it wasn't for the ribbon!
And this card using the AMAZING Ombre Gradient Ribbon I cannot
get enough of. I mean WOW! This Ombre ribbon is perfect in Cotton Candy color.
It adds grace and beauty to your Valentine's Cards. 
 Even this solid Double Ruffle White 7/8" Ribbon is the perfect setting for 
the floret in this card. Amazing quality every single time!
The next time you need to add something special to your paper crafts, 
grab that Ribbons Unlimited ribbon!
Make it special, make it right. 

I hope you enjoyed my projects today- 
Until next time, keep on creating!

Ribbons Unlimited Products Used:


Ribbon Valentine’s Day Cards by Grace

Wednesday, February 12, 2014


Hi there friends. Since Valentine’s day is just around the corner, I decided to share with you two cards featuring some beautiful Ribbon’sUnlimited Inc. trims.


Love you card
Size: 4 ¼ x 5 ½”

1. Create the card base with white cardstock.
2. Cut out a kraft cardstock measuring 4 x 5 ¼” and run it through the die cut machine using a swirl embossing folder. Adhere to the center of the card.

3. Cut a slit on the cut of the card and slip the ruffle ribbon through it. Adhere the trim on the bottom portion of the card and secure the ends on the inside of the card.

4. Repeat step #3 for the smaller dot ribbon, layering it over the ruffle ribbon.

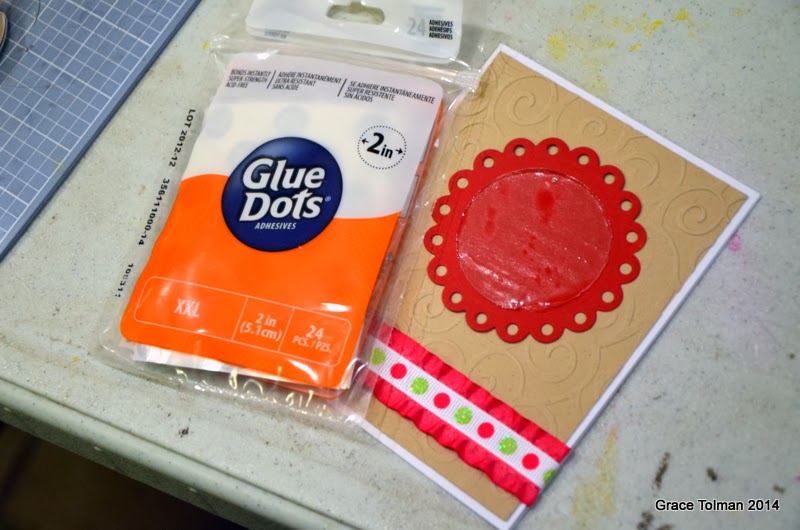
5. Cut out a scallop circle from red cardstock using die cut machine. Adhere on the center of the card. Add a XXL size glue dot in the center. Using the pink ruffle ribbon, create a ruffled flower over the adhesive.

6. Finish off the flower with a button threaded with twine.
7. Stick a couple of heart pins to the top left side of the flower.
8. Add a sentiment block between the flower and ruffle ribbon border, adhere with foam adhesive.


I love us card
Size: 5 ½ x 4 1/4

1. Create the card base with white cardstock.

2. Cut out a kraft cardstock measuring 4 x 5 ¼”. Add some ruffled red ribbon, weaving them over each other and securing the ends on the back of the cardstock. Adhere to the center of the card base.
3. Repeat the steps to create the ruffled ribbon accent from the previous card using a scallop light green cardstock.
4. Adhere to the card using foam adhesive.
5. Add the sentiment and some epoxy dots.

Thank you for taking the time to visit the blog today and I hope my projects inspired you today. Happy Creating!

Supplies Used:
Dazzle Dot ribbon 3/8”, Ribbons Unlimited Inc.
Double Ruffled Hot Pink 7/8”, Ribbons Unlimited Inc.
Double Ruffled Red 3/8”, Ribbons Unlimited Inc.
Cardstock- (white) Walmart; (kraft) Bazzill; (others) WorldWin Papers
Sentiment strips- Elle’s Studio
Pins- Maya Road
Buttons- October Afternoon
Twine- The Twinery
Embossing folder- Cuttlebug, Provo Craft
Scallops die cuts- Spellbinders
Enamel dots- Doodlebug Design Inc.

Ribbons Unlimited Inc. 2014 Design team member


Gift Wrapping with Ribbon! with Jamie

Friday, February 7, 2014

Good Morning Ribbons Unlimited Fans!  It's Jamie back with you and today I am sharing a fun gift wrapped in gorgeous Apple Green Organdy Ribbon in 2-3/4" width!  If you haven't worked with this ribbon before, you are in for a real surprise! This ribbon is an unwired ribbon, however, it does have a monofilament edge (sort of like fishing line) sewn in to it to give it extra body...which make it perfect for tying bows!  

Just have a look...


I love how the sheerness of the ribbon allows you to see the decorative paper underneath and of course we all love a bow that is easy to tie that looks this amazing!


Organdy Ribbon Roses by Crystal

Wednesday, February 5, 2014

Hello Ribbons Unlimited Friends!!
It's Crystal here with a tutorial on how to make roses out of Organdy  2 3/4" size ribbon! Ribbons Unlimited Inc. has a ton of colors so I am sure you will find the right color for your project.  If you follow my blog any at all you know I love making flowers and I will make them from anything that will hold still..lol. Today I am making these roses for hair clips, but again use your imagination as these can be added to anything to doll up your projects.
organdy roses 034
Lets get started
Take your ribbon and fold back and forth until you have 8 layers square 2-3/4 
(this doesn't have to be exact)
organdy roses 001
Your ribbon should look like this now...
organdy roses 002
Find the center and make starter hole with a piercing tool:
organdy roses 003
Then add a brad to center of the ribbons
organdy roses 004
Cut each layer apart so they are now single layers
organdy roses 005
Next make cuts from each corner to the center, do all four sides
organdy roses 008
Then twist the layers so they are all off-center and use your heat gun and carefully heat the ribbon and it will melt and curl (I use a heat gun and not lighter because the lighter will leave brown or black on light ribbon and with the heat gun you also have more control).  Do this until you have the desired look!
organdy roses 011
Your completed rose should look similar to this:
organdy roses 012
Here is the back side of the rose:
organdy roses 013
I also made a smaller one use half the width (folding it over) and only do 4 layers:
organdy roses 014
Cut in half and now you have 8 layers, add brad and make your cuts and heat
organdy roses 015
Here are my 3 flowers! 
Don't you just love how pretty these are? 
This Organdy ribbon has a beautiful shimmer to it...
organdy roses 018
To finish my flowers, I make loops for the leaves with the lime organdy delight 5/8" ribbon
organdy roses 019
organdy roses 022
Then I add felt circles to the back for a more finished look...
organdy roses 024
TIP ALERT: If you are making these for little baby's with fine hair add some of the No slip sheet  (found by the liners for the kitchen cabinets) to the inside of the clip now the flower will not slip on fine hair!
lipgloss tut 020
Now a look at my finished hair clips!
organdy roses 025

organdy roses 027

organdy roses 034
Thanks for stopping by the blog , I hope you learned something new to try with the amazing ribbon found at Ribbons Unlimited! Be sure to stop by the store and order some for those upcoming projects. 
Get scrappy and make something that makes you SMILE : )
8upscrapin_Logo


Related Posts Plugin for WordPress, Blogger...