Showing posts with label Giraffe. Show all posts

Today Minibook by Grace

Friday, October 17, 2014


Hello there friends. Today I’m sharing a mini book project that I created using some 4x6 pocket scrapbook papers. Pocket pages and scrapbook supplies are a rage right now. While I don’t do project life, I still like to get the products cause they’re so cool. Recently, I got a pack of 4x6 papers designed for pocket scrapbooking. I used it as a base for my mini album. I then put it all together with a coil binding.  Because the papers were already cut into one size, I was able to put this book together in record time.


To spruce up the front of the book, I tied some colorful ribbons from Ribbons Unlimited Inc.


Here are a few pictures of the inside pages of the book…
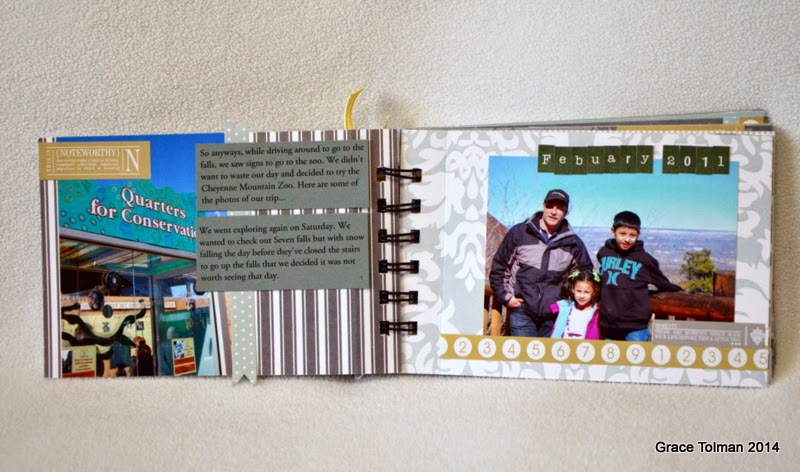

I hope this inspired you to use those pocket scrapbooking products in your next mini album project.

Happy Creating,
Grace
Supplies Used:
#995 Grosgrain stripes, Yellow, 3/8”, Ribbons Unlimited Inc.
Grosgrain, Stripes, 5/8”, Ribbons Unlimited Inc.
Country check, Red, 1”, Ribbons Unlimited Inc.
Lilac Leopard Grosgrain 5/8”, Ribbons Unlimited Inc.
Giraffe 7/8”, Ribbons Unlimited Inc.
Edinburgh, Dress Stewart, 1”, Ribbon’s Unlimited Inc.
Papers and border stickers- Ruby Rock It
Letter stickers- My Little Shoebox
Cardstock- WorldWin Cardstock
Bind it tool- Bind it all, Zutter
Pen- Millennium, Zig

Enamel dots- homemade


Card set with Animal print ribbons by Grace Tolman

Friday, April 18, 2014

Hello Ribbon’s Unlimited Inc. friends. Today I’m sharing a card set that I had created inspired by some of the fantastic animal print trims Ribbon’s Unlimited Inc. offers.
I wanted the ribbons and its design to stand out so I opted for a plain (but texturized) background and added a few stickers just to complete the sentiment.

Instructions:
1. Gather your supplies. I started with three white card base, picked some cardstock that will coordinate well with my ribbons, a sticker sheet to match the theme, buttons, twine and an embossing folder.
2. First I cut the cardstock pieces 1/8” smaller than the card base (my card base are A2 sized which is 4 ¼ x 5 ½”) I ran all of them through my Cuttlebug with a striped background embossing folder from Darice. The striped background reminded me of the lines on a cage that we normally see in a zoo.
3. Next I adhered the cardstocks on the card bases and then matched them with the ribbons that I had. 

4. I then cut a slit on the bottom fold of the card so that the ribbons can slip through it to be adhered on the inside of the card. I also tied two buttons around the trims with twine.
5. I layered some stickers, another button with twine and a sentiment on the top of the page to finish off the cards.
I kept the design of the cards pretty similar to one another which made creating this set super easy and fast.

Here’s another look at the individual cards… 


So there you have it. Who says that you can’t have fun with animal prints? With these cards, you can help but get a little ‘wild’!

Happy Creating,
Grace

Supplies Used:
Cardstock- WorldWin Papers, Bazzill
Stickers- (sentiments) SRM Stickers; (others) SEI
Buttons- Foo fala
Twine- Doodlebug Design Inc.
Embossing Folder- Darice
Scallop die- Spellbinders

Frame punch- EK Success


Scrapbook page with ribbon flair by Grace

Friday, February 21, 2014

Hello Ribbons Unlimited Inc. friends, Grace here to share with you how 
I incorporate ribbons to my scrapbook pages.

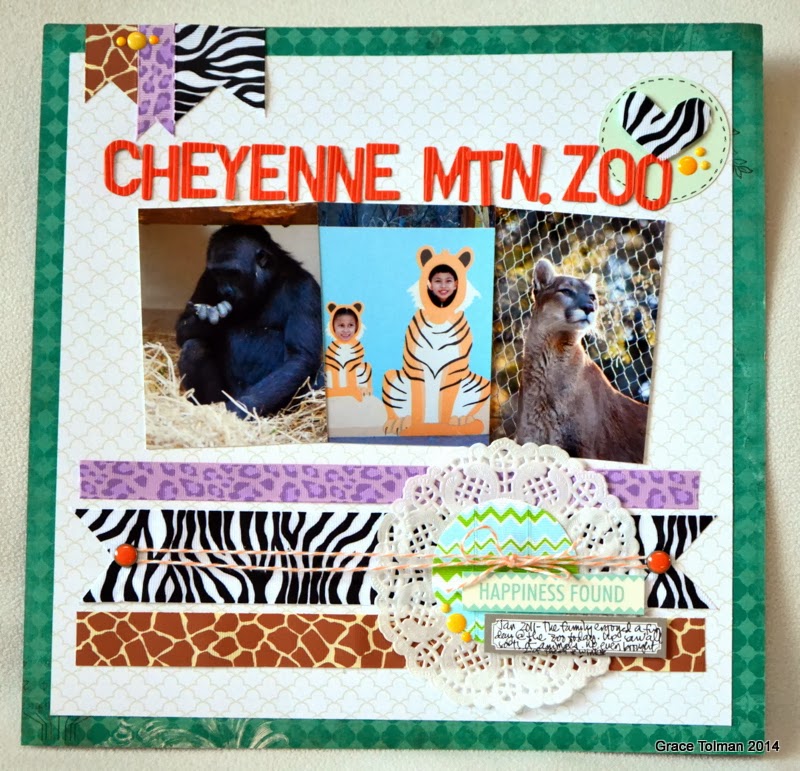
When I received these animal print ribbons, I knew exactly what page to create with it. What I found to be challenging was to find unusual ways to add the ribbons to the page. Thankfully, the variety of sizes and prints of the ribbon ignited some great ideas. Read on to see more how I created this page….


1. Create the scrapbook page foundation. Cut a white pattern paper into an 11” square and adhere to the center of the dark green paper. Add the three 4x3 photos to the center of the page.
2. Cut out the ribbons to fit the inside of the white paper and lay it horizontally on the page. Cut the widest ribbon’s edges into notches and adhere to the layout.

3. Add the same three ribbons on the top left edge of the page. Cut the edges into notches before adhering them.


4. To add some texture and layers to your page and ribbon, poke two holes on the ends of the longest ribbon. Attach brads through the holes.


5. Wrap some twine around the brads and tie the ends into a bow.


6. Cut out a handmade heart out of the wide zebra print ribbon. Add some fray check on the edge of the shape so that the ribbon threads don’t unravel. Add some pen stitching around a die cut circle, adhere to the top right edge of the page and add the heart ribbon using foam adhesive. Add the title.


7. Add a pattern paper like circle shape using ribbon. Cut out a scrap of circle from paper. Add adhesive all over the top of the paper. Add the strip of ribbon, making sure to match the pattern. Trim the excess. Add fray check to the edges of the cut so that the ribbon ends don’t fray.
8. Add some more embellishments and handwritten journaling.


I hope that my post today inspired you to pull out your favorite ribbons and add them to scrapbook pages. Find ways to incorporate them in the most unusual way. Happy creating!

Supplies Used:
Applegreen/blue chevron 7/8”, Ribbons Unlimited Inc.
LilacLeopard Grosgrain 5/8”, Ribbons Unlimited Inc.
Giraffe 7/8”, Ribbons Unlimited Inc.
Zebra festribbon 1 ½” , Ribbons Unlimited Inc.
Cardstock- WorldWin Papers
Pattern papers- (dark turquoise) BoBunny; (white) Creative Memories; (word/journaling strips) Elle’s Studio
Letter stickers- Thickers, American Crafts
Brads- My Mind’s Eye
Twine- The Twinery
Enamel dots- Doodlebug Design Inc.
Circle cutter- Creative Memories
Pen- Millennium, Zig
Others- Fray Check, Dritz

Doily- Doodlebug Design Inc. 

Ribbons Unlimited Inc. 2014 Design Team Member


Gift Bow with Jamie Cripps

Wednesday, November 27, 2013

Good Morning Ribbons Fans!
Jamie back with you today to share a fabulous tutorial for making homemade gift bows I found over on Monica Edward's blog!  The bows are super easy and the results are stunning…just have a look!

The image to the left is after the bow was removed from the template and the image to the right is the finished bow once pulling all the layers apart!

For this bow I am using the Giraffe Print Grosgrain Ribbon in 7/8".  This ribbon is a little stiffer than some of my other grosgrain ribbons so it wrapped around the template well and also holds it shape!


You can find more Animal Print Ribbons through the link below:
http://shop.ribbonsunlimitedinc.com/animal-print-ribbon-c153.aspx

And be sure to check out Monika's tutorial to create your own gift bows!

Thanks so much for stopping by today!


Ribbon Holder Cards and Box

Friday, August 2, 2013

Hi guys!  Jamie back with you today to share a fun project to help you store your ribbons!
I created this ribbon holder box and cards using my digital die cutting machine then I simply wrapped my extra ribbons around each of the cards and placed them in the box.  Now all my ribbons are tidy and easy to access!  This is perfect for your scrap pieces or for condensing down your spools of ribbons!


Do you see all that beautiful ribbon?

How do you store your ribbon!  We'd love to see...
Link us up in the comments below!


Related Posts Plugin for WordPress, Blogger...