Showing posts with label Polka Dot Ribbon. Show all posts

Throw pillow by Nicole

Friday, July 3, 2015

Nicole here on the blog today to share a throw pillow I made accented with ribbon.  I've been meaning to make a throw pillow for my sis for awhile.  When this pink ribbon came in my box I knew it was the perfect time since pink and black were her wedding colors.  


I started by making piping with cording and hot pink ribbon.  The cording I found at the craft store in the upholstery findings.  


I cut enough of the cording to go around my pillow and then made it just a tad bit longer.  Now you'll take the cording and place it in the middle of the ribbon and pin it closed.  

Once the length is pinned I did a simple straight stitch down the length of the ribbon.


Now I cut a piece of drop cloth material big enough to fit my pillow top.  The finished piping I pinned around the edges of the drop cloth being careful around the corners.    

Attach with another pass through the sewing machine.
Now to embellish that pillow top.  I used my Silhouette Cameo to cut a piece of vinyl.  Once cut I carefully laid the design on the center of my pillow top.  

The vinyl was giving me grief since I didn't get it to lay flat and it was bubbling slightly around the edges of the hearts.  To make sure the paint didn't bleed under the edges of vinyl I used a foam brush to add the black acrylic paint in an up and down motion.    
Once the paint dried I removed the vinyl and also cut three of the hearts out with a pair of fabric scissors.   

These hearts I filled with the patterned ribbon.  I took pieces of drop cloth and traced the heart shapes with a pencil.  These are going to be my base to which I attach the ribbon and and will also be placed behind the cutouts.  

Using Helmar Fabric Glue I attached all the ribbon over the top of the hearts.  
I then pinned them in place and added more glue around each of the openings on the back to secure them in place.  


Once all the glue was dry I added some sewing details with pink embroidery floss.  


I then finished off my pillow by sewing two smaller pieces of drop cloth material to form a envelope cover.  


Here is another look at the finished pillow.


Thanks so much for stopping by the blog today.

Ribbons used in this project:


All digital SVG files from digiplayground.com


Graduation Gift Set by Nicole

Friday, June 5, 2015

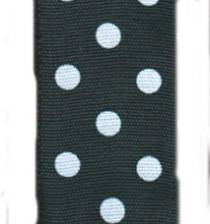
Graduation season is here.  Since I work with the youth at church I had a graduation to celebrate this year.  Our local high school colors are black & yellow with white accents.  I used Black/White Polka Dot wired ribbon, Sheer Organdy ribbon in Apple Green, and Dazzle Ribbon in Ivory to decorate this gift bag.  


I added the Black/white polka dot ribbon through the holes in the bag and secured it on the inside with Helmar Fabric Glue.  Side note:  Between the depth of the holes in the bag and the wire in the ribbon the handles stood up on there own.  I love the look and height it creates to the finished bag.  


The organdy ribbon I used to make leaves.  I brushed Helmar Stiffener & Draping Liquid to lengths of the ribbon with a foam brush.  Fully saturate the ribbon and let dry.  


After a couple of hours the glue dries and the ribbon becomes stiff and you can carefully peel away from the paper plate.  
The stiffener makes the ribbon stiff, but it also allows you to cut the ribbon and keeps it from fraying.  I used a pair of fabric scissors and cut the ribbon in to leaf shapes.  

I glued these to the bag handle.  

I then took a length of the glitter ribbon to make my flower.  I threaded it onto a piece of wire to form the base.  

I formed the wire into a circle and twisted the wire onto the base cutting off the excess.  

I took another length of the glitter ribbon and began gluing it around itself to form the center making sure to cover the wire and inside.     

My finished flower.

I glued this on top of the leaves. Once finished I decided to add some depth to my flower with a yellow marker making the insides of the flower a little darker.  


Here is a look at the finished gift bag and card I gave to the graduate.  She loved it!

Thanks for stopping by the blog today.  
Happy Crafting, Nicole

Products used in this post:

All digital svgs are from digiplayground.com


Ribbon Accents for Layouts by Grace

Friday, September 12, 2014


Hello Ribbon friends. Today I’m sharing a layout I created recently with some ribbon accents from Ribbons Unlimited Inc. My favorite part of adding ribbon to my scrapbook pages is finding ways to layer and create dimension with them. With the different widths that Ribbons Unlimited Inc. offers, it was super easy to achieve my goals. Read on to see how I created this scrapbook page….


Instructions:
1. Gather your supplies


2. Trim the grey pattern paper to about 11 ½” square and adhere to the yellow cardstock, centering it. Adhere the pictures. 


3. Add the journaling block on the bottom of the layout, next to the photo. Cut the ends of three different ribbons into a notch and adhere them on the left side of the layout, layering them over each other a little bit. 


4. Add the title using two different sizes of letter stickers. 


5. Add the yellow grosgrain striped ribbon on the bottom of the layout, ruffling it a little bit and attaching it with some machine stitching.  


6. Add other embellishments, layering them over each other. Add some glitter glue to the centers of the butterflies and set aside to dry.

Here’s a few close ups of the scrapbook page…


I hope this inspired you to layer your trims and ribbons on your next scrapbook page.
-Grace


Supplies Used:
#995 Grosgrainstripes, Yellow, 3/8”, Ribbons Unlimited Inc.
Royal/white dots, Polka dot, 1 1/2", Ribbons Unlimited Inc. 
Grosgrain,Stripes, 5/8”, Ribbons Unlimited Inc.
Countrycheck, Red, 1”, Ribbons Unlimited Inc.
Cardstock- Worldwin Papers
Pattern papers- My girl, American Crafts
Butterfly chipboard- Studio Calico
Glitter glue- Turquoise, Stickles, Ranger Industries
Stickers- American Crafts, My Mind’s Eye
Circle punch- EK Success
Pen- Millenium, Zig


Related Posts Plugin for WordPress, Blogger...