Showing posts with label Scrapbooking. Show all posts

1 Month Baby Layout - Jamie

Sunday, November 29, 2015

Hi everyone!

Jamie here, and today I would like to share this layout of my youngest daughter Harmony.


The blue butterfly background was cut down to size and then I cut the title out with my silhouette. I placed my 2" wide Coral Nylvalour Velvet Ribbon under the title and put the background title paper on pop dots.


I cut the hearts out and added them in place as well as the little banner. I finished the layout off with a wood veneer heart next to the heart at the bottom and added my journaling in white gel pen. I hope you enjoyed looking at my layout today!


Thanks for stoppin' by and have a wonderful day!


Back to the basics by Nicole

Saturday, October 3, 2015

Hello everyone!  Nicole here on the blog today.  Scrapbooking.  So I've been at it for over 10 years now.  I've gone through all kinds of fads and tried to keep up with the latest and greatest.  Lately though I've started trying to get back to the most important things:  the pictures and words.  As much as I like my layers and all the embellishments I also like this simple layout where a piece of ribbon and some buttons are my only embellishing.


I started this layout in Photoshop where I pulled in my photos, typed my title and journaling, and then added some "ribbon".  

Once I was happy with the placement I removed my photos and "ribbon" and printed the text onto white textured card stock.  


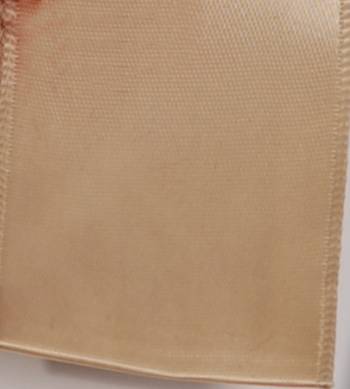
I used the wired satin ribbon in Sable and folded it in half to notch the end with some fabric scissors.  I used a little bit of clear glue on both ends to keep the edges from fraying and leave a clean finish.  To attach to my layout I used double sided adhesive. The small finishing touches are some buttons and a little date tag.   

Here is another look at my finished layout.  I'm really happy with the results and love that the pictures and text take center stage while the ribbon and buttons add just a small textile touch.  


The best part of putting together this layout was knowing this moment was recorded and these sweet pictures of my youngest are printed and off the computer. 

Thanks for stopping by the blog today.  Happy Crafting, Nicole

Ribbon used on this project:


Baby Scrapbook Layout by Jamie L.

Friday, May 29, 2015

Hey everyone,

Jamie here! Today I have a scrapbook layout to share with you all. These are some pics of my youngest at the hospital being held by her Uncle Aaron (my husbands brother). For my layout I used a lot of scrap papers, my silhouette cameo to make the title, but most importantly some fantastic Nylvalour Velvet Ribbon in coral (2" wide) from Ribbons Unlimited Inc.


I'd like to show you all how I used the ribbon on this layout, I tried to go outside the box a little. I have a quick picture tutorial. I hope you enjoy it.

I cut a portion of ribbon about 3-4inches long. I then flipped the ribbon over and free handed a shape on the back in white gel pen (in this case an arrow).


I then cut the arrow out with scissors.

After the arrow was cut I used the scraps to make little banners and another arrow.

Simple but super cute and it gives the page some texture and softness. I really like it and I hope you do too!

Thanks for stoppin' by and have a great day!


Ribbon Accents for Layouts by Grace

Friday, September 12, 2014


Hello Ribbon friends. Today I’m sharing a layout I created recently with some ribbon accents from Ribbons Unlimited Inc. My favorite part of adding ribbon to my scrapbook pages is finding ways to layer and create dimension with them. With the different widths that Ribbons Unlimited Inc. offers, it was super easy to achieve my goals. Read on to see how I created this scrapbook page….


Instructions:
1. Gather your supplies


2. Trim the grey pattern paper to about 11 ½” square and adhere to the yellow cardstock, centering it. Adhere the pictures. 


3. Add the journaling block on the bottom of the layout, next to the photo. Cut the ends of three different ribbons into a notch and adhere them on the left side of the layout, layering them over each other a little bit. 


4. Add the title using two different sizes of letter stickers. 


5. Add the yellow grosgrain striped ribbon on the bottom of the layout, ruffling it a little bit and attaching it with some machine stitching.  


6. Add other embellishments, layering them over each other. Add some glitter glue to the centers of the butterflies and set aside to dry.

Here’s a few close ups of the scrapbook page…


I hope this inspired you to layer your trims and ribbons on your next scrapbook page.
-Grace


Supplies Used:
#995 Grosgrainstripes, Yellow, 3/8”, Ribbons Unlimited Inc.
Royal/white dots, Polka dot, 1 1/2", Ribbons Unlimited Inc. 
Grosgrain,Stripes, 5/8”, Ribbons Unlimited Inc.
Countrycheck, Red, 1”, Ribbons Unlimited Inc.
Cardstock- Worldwin Papers
Pattern papers- My girl, American Crafts
Butterfly chipboard- Studio Calico
Glitter glue- Turquoise, Stickles, Ranger Industries
Stickers- American Crafts, My Mind’s Eye
Circle punch- EK Success
Pen- Millenium, Zig


Related Posts Plugin for WordPress, Blogger...