Showing posts with label Sheer. Show all posts

Sparkle Journal by Steph

Friday, October 9, 2015

Good morning everyone, Steph Ackerman here today with an altered journal.


This journal was kind of bland so I covered it with cardstock, added die cuts, a stamped phrase to the center and some rhinestones.  A bland journal turns into a pretty journal. 


Journals are a fun way to use ribbon - tie the ribbon to the rings or completely cover the rings and tie a ribbon as I've done.  And using a wired ribbon means the ribbon holds it's shape.  I've used Four Seasons Wired Sheer Ribbon in Champagne.

Thanks for stopping by today.

Steph


Happy Day Card by Steph

Friday, July 17, 2015

Good morning everyone, Steph Ackerman here with a card using some really pretty Four Seasons Wired Sheer Ribbon in Aqua.   At 1 1/2" wide, it is just the right size to decorate cards. 


The Aqua ribbon coordinated perfectly with the colors in my card.  I mixed the ribbon amongst the flowers and used brads to adhere the ribbon to the card.


The flowers were stamped with ColorBox Background Basics by Ann Butler  and ColorBox Crafter's Ink in Berry.  To finish, I added Flower Soft to the flower centers and added a sentiment from So Suzy Stamps to the right corner.

Thanks for stopping by today.


Graduation Gift Set by Nicole

Friday, June 5, 2015

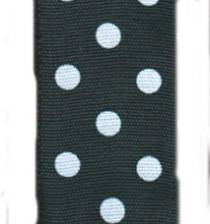
Graduation season is here.  Since I work with the youth at church I had a graduation to celebrate this year.  Our local high school colors are black & yellow with white accents.  I used Black/White Polka Dot wired ribbon, Sheer Organdy ribbon in Apple Green, and Dazzle Ribbon in Ivory to decorate this gift bag.  


I added the Black/white polka dot ribbon through the holes in the bag and secured it on the inside with Helmar Fabric Glue.  Side note:  Between the depth of the holes in the bag and the wire in the ribbon the handles stood up on there own.  I love the look and height it creates to the finished bag.  


The organdy ribbon I used to make leaves.  I brushed Helmar Stiffener & Draping Liquid to lengths of the ribbon with a foam brush.  Fully saturate the ribbon and let dry.  


After a couple of hours the glue dries and the ribbon becomes stiff and you can carefully peel away from the paper plate.  
The stiffener makes the ribbon stiff, but it also allows you to cut the ribbon and keeps it from fraying.  I used a pair of fabric scissors and cut the ribbon in to leaf shapes.  

I glued these to the bag handle.  

I then took a length of the glitter ribbon to make my flower.  I threaded it onto a piece of wire to form the base.  

I formed the wire into a circle and twisted the wire onto the base cutting off the excess.  

I took another length of the glitter ribbon and began gluing it around itself to form the center making sure to cover the wire and inside.     

My finished flower.

I glued this on top of the leaves. Once finished I decided to add some depth to my flower with a yellow marker making the insides of the flower a little darker.  


Here is a look at the finished gift bag and card I gave to the graduate.  She loved it!

Thanks for stopping by the blog today.  
Happy Crafting, Nicole

Products used in this post:

All digital svgs are from digiplayground.com


Christmas Ornament by Crystal

Wednesday, December 31, 2014

Hello Ribbons Unlimited, Inc Fans!

It's Crystal here and today I want to share one of my ornaments of the many I made this year , I have been a busy little elf ..lol  Custom Ornaments are the perfect gift for teachers bus drivers and yes even the lady who does your hair , I do these custom ornaments and top them off with bows made from Ribbons Unlimited Inc , this one I am using Luxor silver metallic sheer wired edge  2 3\8", this ribbon adds the perfect elegant touch .


Front 

IMG_3488

Back


I take a clear ornament glitter the inside and then add my vinyl art that I design up to it , and top it off with an amazing bow.

Thanks so much for stopping by , leave me some feed back if you loved this project ,
I love hearing from my scrappy computer friends who love getting crafty : )
Crystal Lopez – Design Team member for Ribbons Unlimited


crystal_lopez_bio_pic


JOY Gingerbread Banner by Pinky

Wednesday, December 10, 2014

Hey friends, 
it's Pinky again with another holiday craft idea using Ribbons Unlimited. 
This JOY Gingerbread banner is perfect to use RU Sheer Ribbon!
The sheer ribbon comes in all sizes too, you'll find the size for any project. 
 For this project I took a clear acrylic banner and decorated it using
a Snow Writer for the frosting and patterned paper.
 Then I added more glitter and patterned paper. 
 Then I tied it together using Ribbons Unlimited Sheer Ribbon in 1 1/2". 
After I tied it together I created 4 bows, and glued them onto the places I tied. 
If you add the bows after you tie it together then they won't twist and turn on the banner, 
they stay upright. Just a dab of hot glue to ensure placement!

This would be amazing on the tree, on the wall, or even as a photo prop!


All Dolled up Layout by Grace Tolman

Wednesday, April 9, 2014

Hello ribbon friends. Today I’d like to share with you a scrapbook page featuring a fun masking technique made with the wide sheer ribbon.

I love the trend of stencils. It’s so fun and an easy way to add great designs to any page. I decided that the wide sheer ribbon would be a great piece to try this technique on.

Instructions:
1. First I covered my work surface with scrap paper. I laid my ribbon over it and taped the ends with a bit of washi tape so that it doesn’t move during my inking.
2. I then picked the stencil that I wanted to use. I have a 12x12 stencil from Heidi Swapp and I thought that the length was perfect for a scrapbook page. I sprayed my ribbon (with stencil over it) with Bronze mist and set it aside to dry.
3. After it had dried, I then added the ribbon piece on my layout.  I layered some more papers and embellishments to complete my page.

Here’s another look at the finished project:


Thank you for stopping by and I hope you try the stencil technique for your next ribbon project.

Happy Creating,
Grace


Supplies Used:
Cardstock- The Paper Company
Pattern papers- (Background) Yes Please, American Crafts; (others) Party day, Crate Paper
Chipboard stickers- Soleil, Basic Grey
Doilies- Doodlebug Design Inc.
Hand and bee stickers- SRM Stickers
Letter stickers- (white) Basic Grey; (turquoise) Webster’s Pages
Circle cutter- Creative Memories
Mist and Stencil- Heidi Swapp
Pen- Millenium, Zig
Journaling font- Century Gothic, MS Word
Button- Foofala
Twine and Tag- Source Unknown


Fall Projects with Pinky

Friday, November 29, 2013

As we are diving into the Christmas season I am still loving 
my handmade fall projects that were created with the soft 
This month not only did I create these two door hangers that 
annoy my boys to no end! LOL (I love them so they stay on the doors). 
 But also this lovely Fall Home Sweet Home Banner.
 Each one held together with the beautiful Ribbons Unlimited Sheer Ribbons. 
I hope you are ready to create and add Ribbons Unlimited to your list!
Until next time- Keep On Creating-

Products Used:


Welcome Fall Chalkboard by Pinky

Wednesday, October 16, 2013

Good morning Ribbons Unlimited friends, 

I know when you think of ribbons you probably don't jump to chalkboards!
BUT I am here to remind you that every project you create from that
scrapbook page to the seasonal home decor projects...ALL of them will rock
with some added ribbon! 

 I REALLY wanted to make a FALL home decor project
and when I saw this Ribbons Unlimited Chocolate Sheer Ribbon I knew it
would be perfect for this handmade chalboard I created. 
1. Paint wooden album page or wood plaque using Folk Art Chalkboard Paint. 
2. Create your canvas fall leaves using Smooch Spritz and ink (Stencil from Thickers). 
3. Trim paper paper to 4"X6.5". 
4. Layer patterned paper. 
5. Adhere canvas leaves.
6. Stitch through patterned paper pieces. (I just used my sewing machine)
7. Punch holes for ribbon on top of paper piece. 
8. Thread Ribbons Unlimited 7/8" Organdy Sheer Ribbon (Chocolate) through
top and sides of chalkboard piece, tie off and trim.
9. Create bow from Ribbons Unlimited 7/8" Organdy Sheer Ribbon (Chocolate).
10. Adhere to bottom of patterned paper pieces.
11. Add floral embellishments. 
That is all! Home decor perfect for any season you choose. 
Now I am off to SEW my next project! Cannot wait to share. 

Until next time- Keep on creating!!

Products Used:
Petaloo flowers, Linnie Blooms Canvas, Genuinely Jane Wood Album, Crate paper, Folk Art Chalkboard Paint


Related Posts Plugin for WordPress, Blogger...